Servicing24/Docs/Support Tickets

Ticket List

The All Tickets page shows every support ticket in your organization. You can filter, search, and sort tickets to quickly find what you need.

app.servicing24.com/supportTicket
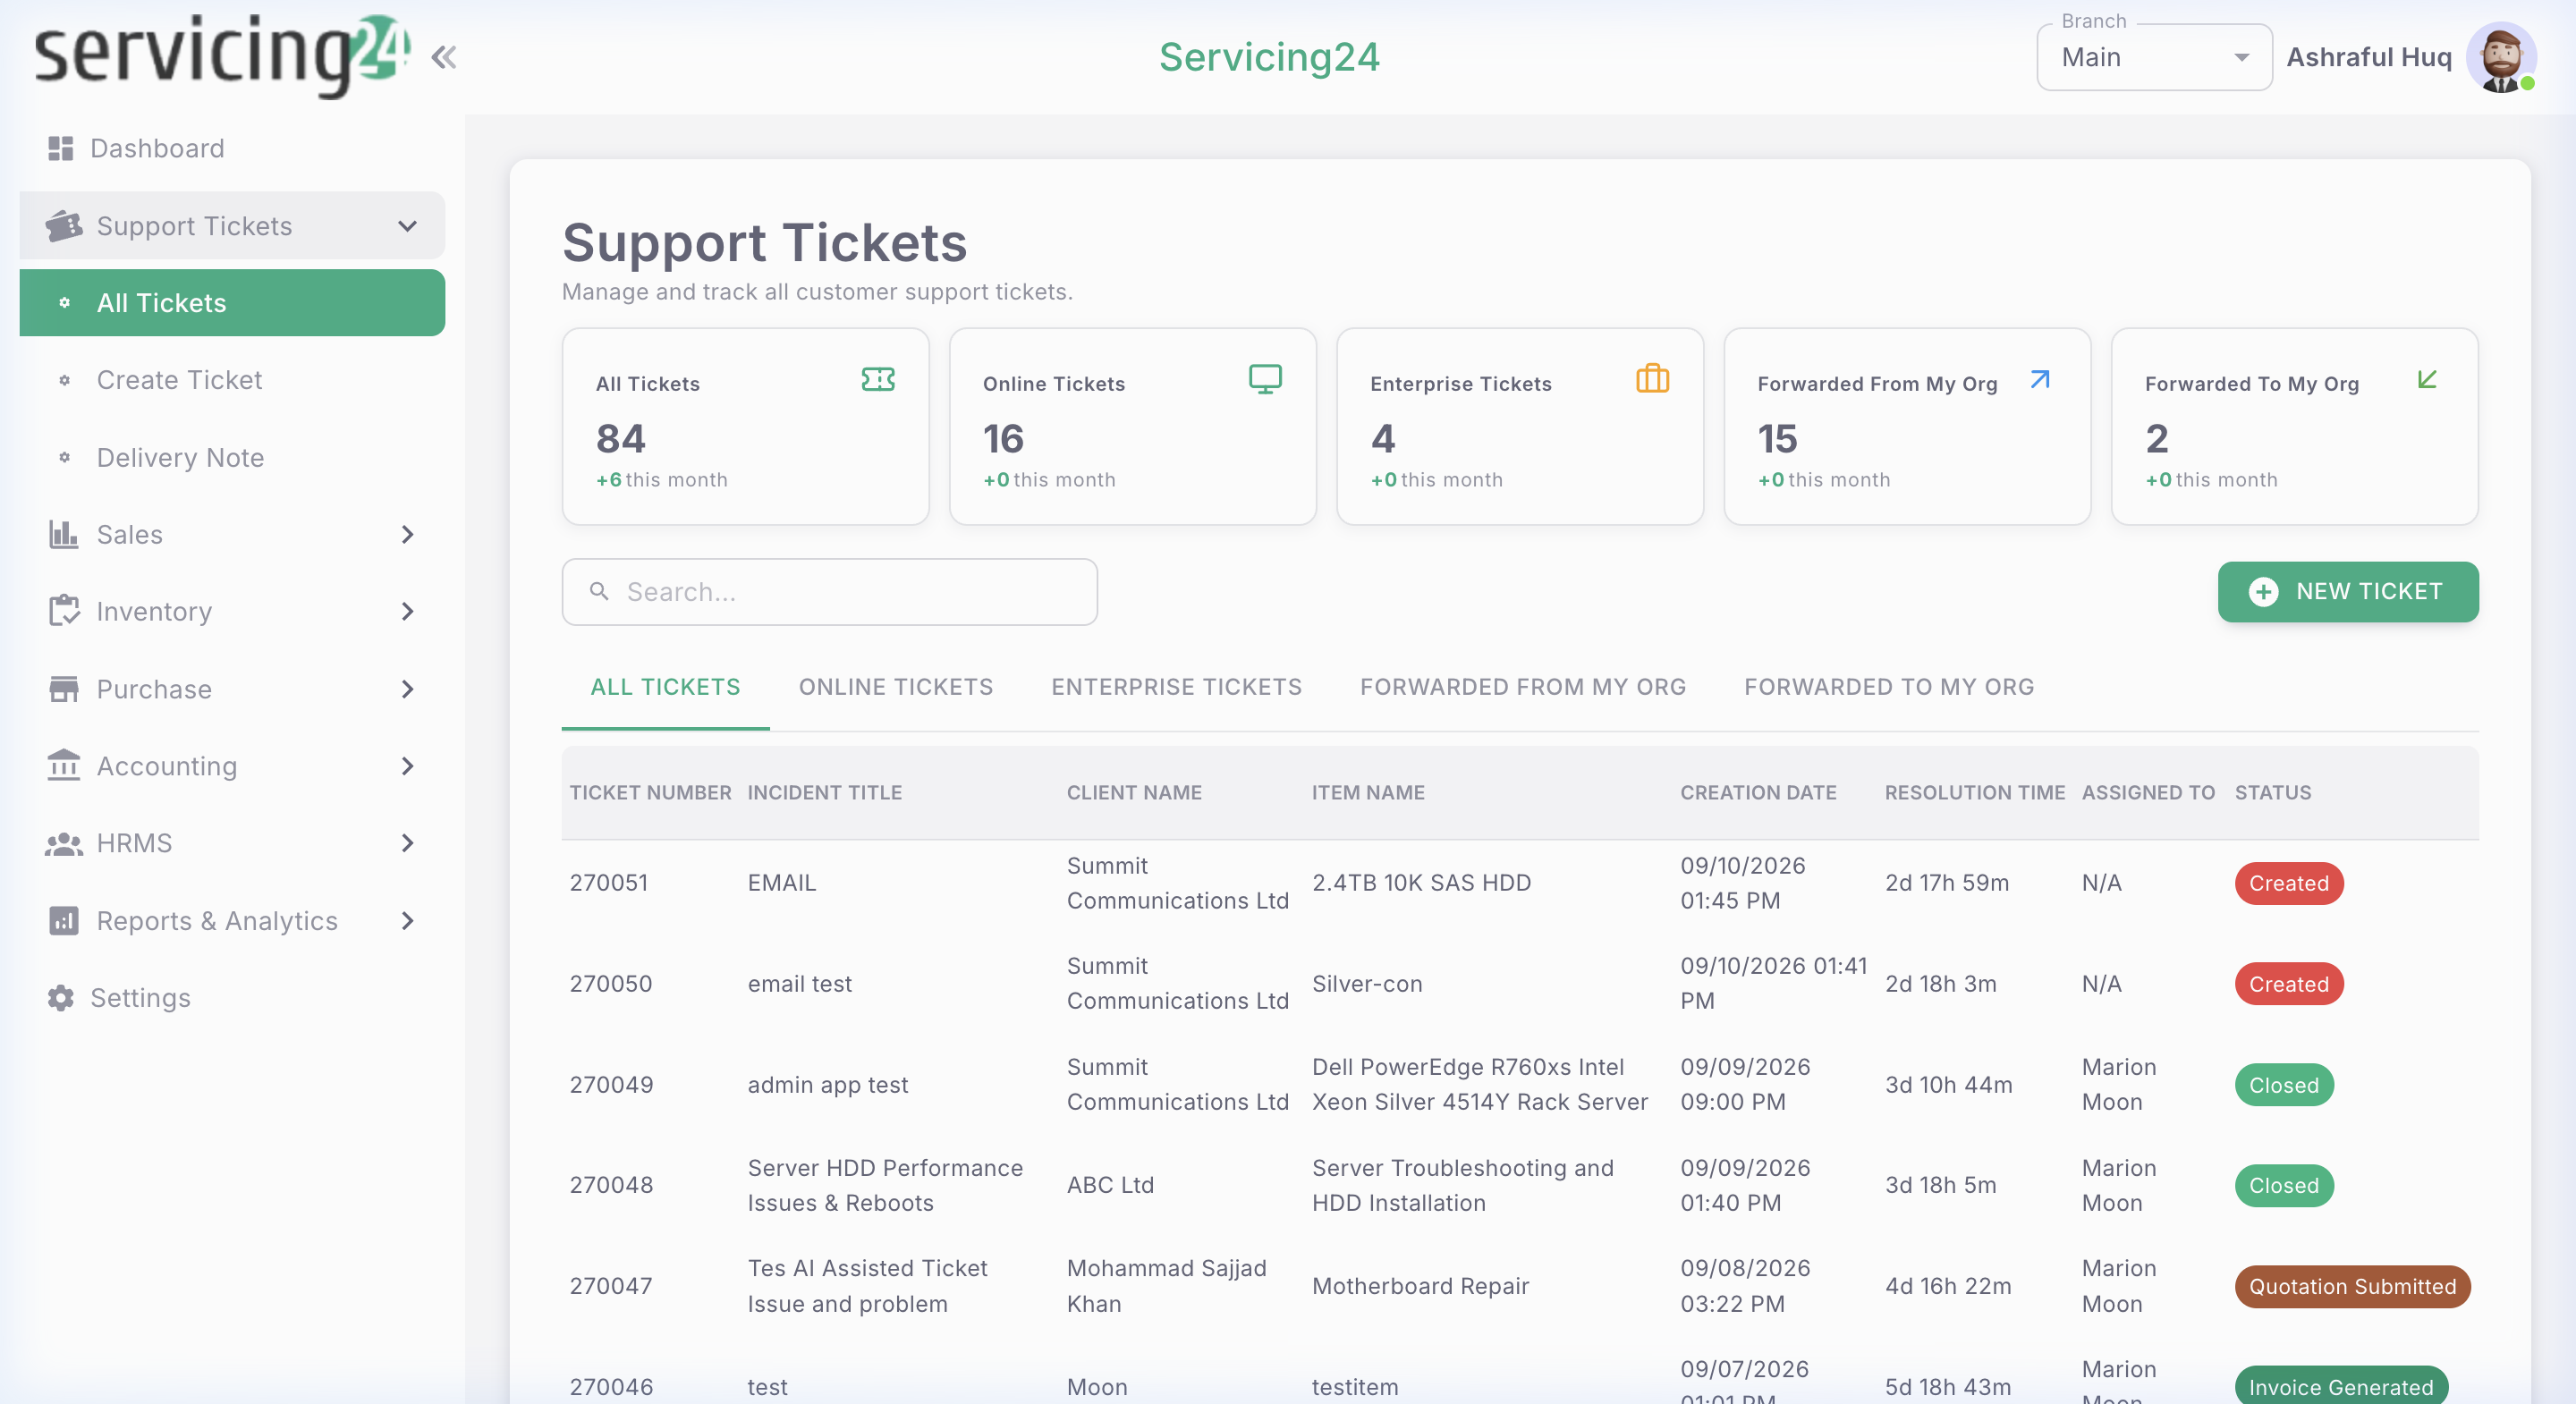
All Tickets list view โ€” showing ticket ID, customer, status, priority, and assigned agent
๐Ÿ“ธ All Tickets list view โ€” showing ticket ID, customer, status, priority, and assigned agent
๐Ÿ” Search
Search by ticket ID, customer name, or description.
๐Ÿท๏ธ Filter by Status
Filter Open, In Progress, Resolved, or Closed tickets.
๐Ÿ“… Filter by Date
Show tickets created in a specific date range.
๐Ÿ‘ค Filter by Agent
See tickets assigned to a specific team member.
โšก Priority Filter
View High, Medium, or Low priority tickets.
๐Ÿ“ฅ Export
Export the filtered ticket list to Excel or PDF.

Create a Ticket

Creating a new support ticket captures all the information needed to track and resolve a customer issue from start to finish.

app.servicing24.com/supportTicket/create-support-ticket
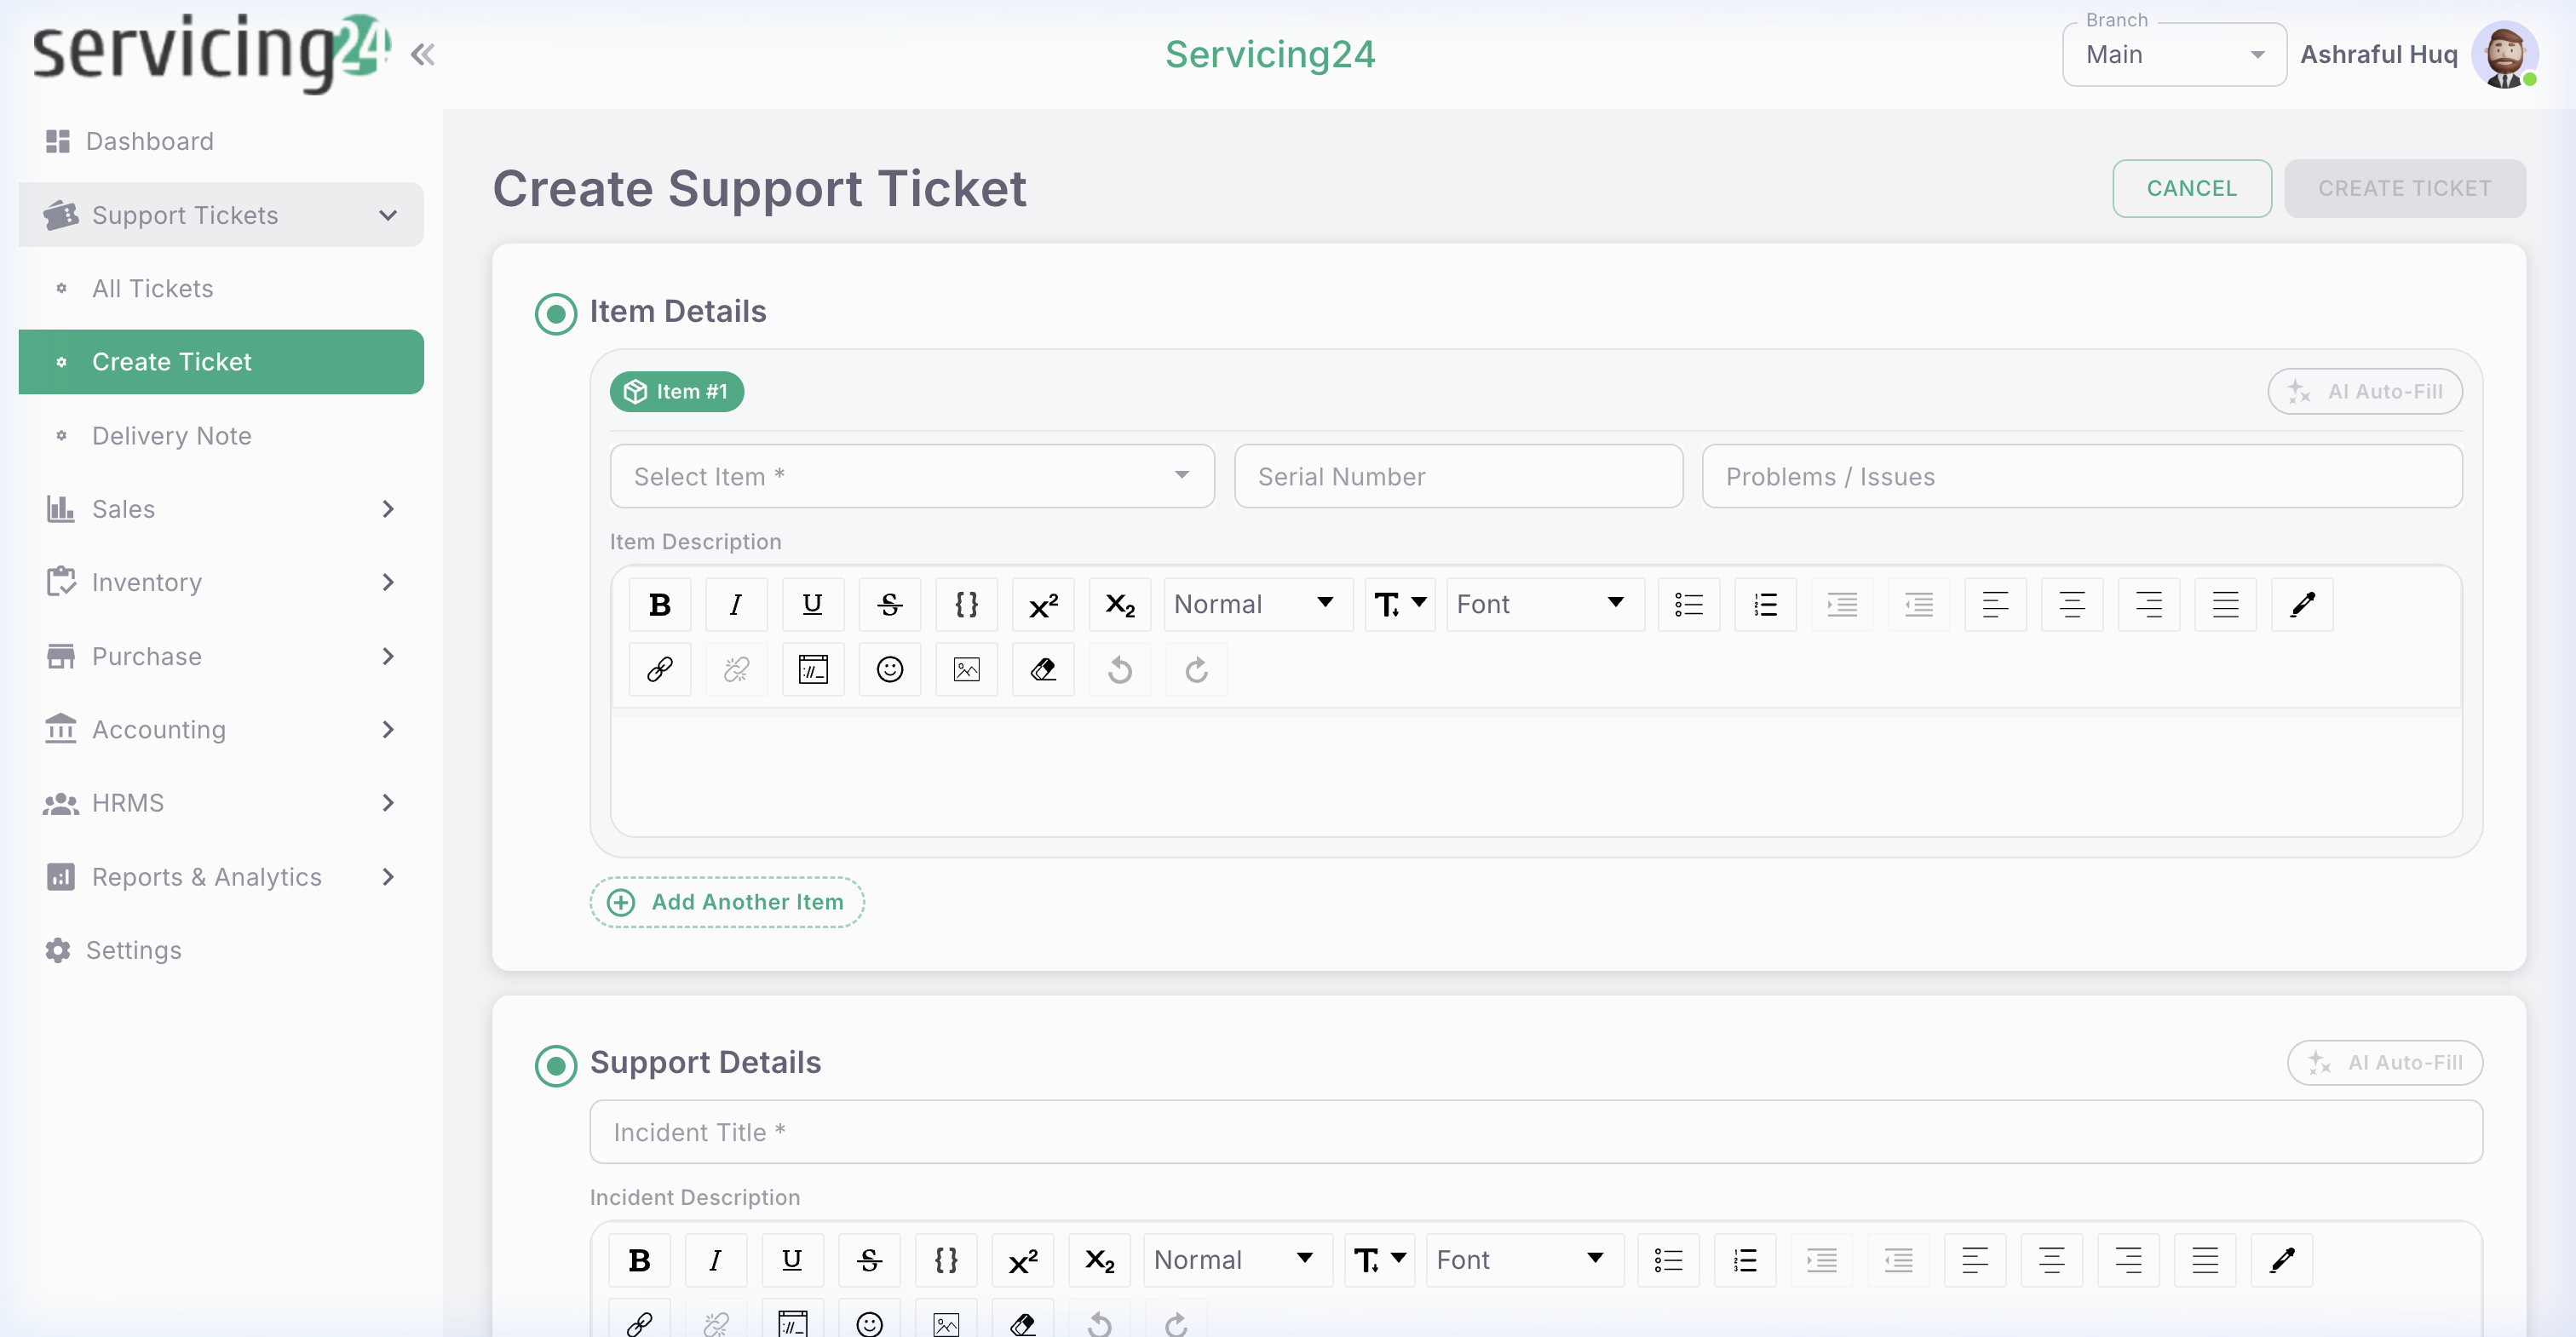
Create Support Ticket form โ€” fill in all required information
๐Ÿ“ธ Create Support Ticket form โ€” fill in all required information
1
Click 'Create Ticket'
From the sidebar, go to Support Tickets โ†’ Create Ticket, or use the quick action on the Dashboard.
2
Select the Customer
Search for an existing customer by name or phone number. If the customer is new, click 'Add New Customer' to register them first.
3
Fill in ticket details
Enter the issue title/subject, description of the problem, and any relevant device or product information.
4
Set Priority and Category
Choose the priority level (High / Medium / Low) and select the appropriate service category.
5
Assign to an Agent
Select the technician or support agent who will handle this ticket from the 'Assigned To' dropdown.
6
Attach files (optional)
Upload photos, documents, or screenshots related to the issue. Supported formats: JPG, PNG, PDF, DOCX.
7
Click 'Submit Ticket'
The ticket is created with a unique Ticket ID and the customer receives an automatic confirmation with a tracking link.
New ticket appears in the list with Pending status
๐Ÿ’ก
TipThe customer automatically receives an SMS/email with their unique ticket tracking URL so they can monitor progress without logging in.

Assign & Update Status

After a ticket is created, agents can reassign it, escalate it, and update its status as work progresses.

1
Open the ticket detail
Click any ticket row in the list to open the full ticket detail view.
2
Change the assigned agent
Click the agent name in the 'Assigned To' field and select a different team member from the dropdown.
3
Update the ticket status
Click the status badge to cycle through: Pending โ†’ In Progress โ†’ Waiting for Parts โ†’ Resolved โ†’ Closed.
Pending
In Progress
Waiting Parts
Resolved
Closed
4
Set resolution details
When resolving, enter the resolution description, parts used, and labor time. This feeds into reporting and invoicing.
โš ๏ธ
WarningClosing a ticket is permanent and will notify the customer. Only close when the issue is fully resolved and confirmed.

Add Notes & Files

The ticket detail page has a notes/comments section for internal communication and customer-facing updates.

1
Scroll to the Activity section
In the ticket detail, scroll down to find the Activity & Notes panel.
2
Choose note type
Select Internal Note (only visible to your team) or Customer Reply (visible to the customer in their portal).
3
Write your note
Type your update, diagnosis, or customer communication in the text box.
4
Attach files if needed
Drag and drop or click to upload images or documents with the note.
5
Click 'Add Note'
The note is saved with a timestamp and the name of the agent who added it.
โ„น๏ธ
NoteInternal notes are highlighted differently from customer replies so agents can easily distinguish between them.

Delivery Note

When a repaired item is ready to be returned to the customer, generate a Delivery Note to document the handover.

app.servicing24.com/deliverynote
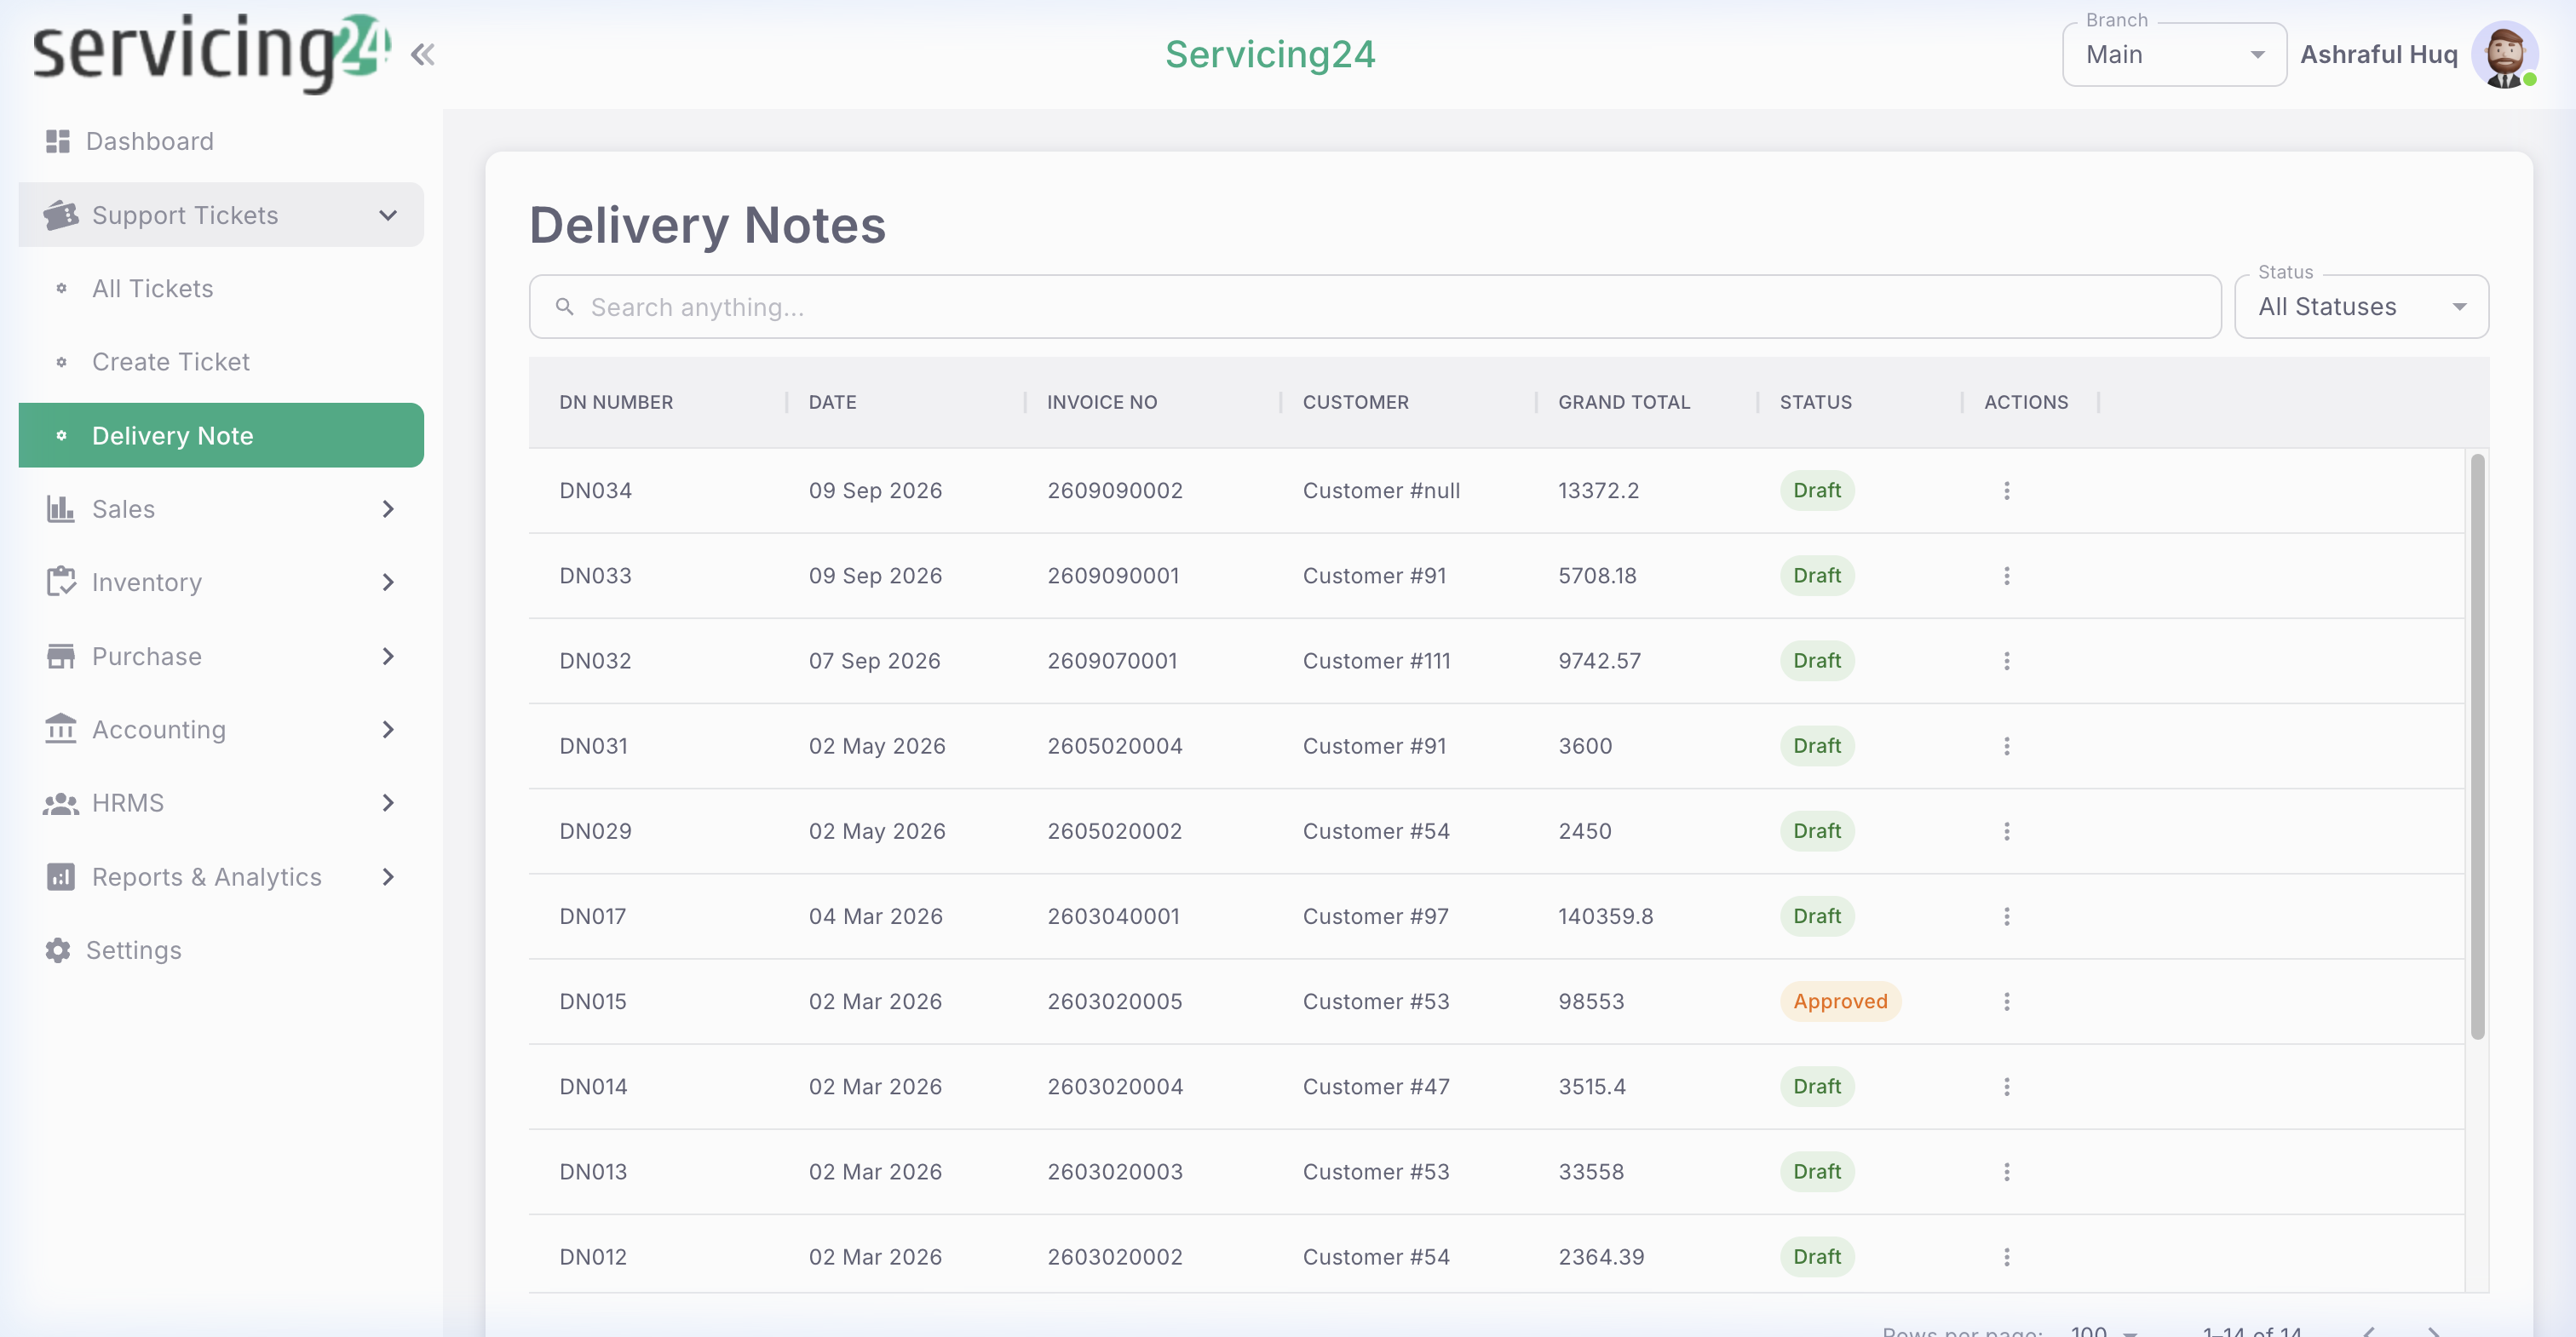
Delivery Note list โ€” showing all issued delivery notes
๐Ÿ“ธ Delivery Note list โ€” showing all issued delivery notes
1
From the ticket, click 'Generate Delivery Note'
At the bottom of a resolved ticket, you'll find the option to generate a delivery note.
2
Review the delivery note details
The form auto-fills with ticket information, customer details, and items serviced. Review and adjust as needed.
3
Add parts and items returned
List all parts, accessories, or devices being returned to the customer.
4
Print or share
Print the delivery note for physical signature, or share it digitally via email/WhatsApp.
5
Customer signs and it's done
Upon the customer's acknowledgment, mark the delivery note as Delivered.

Customer Ticket Tracking

Every ticket gets a unique public tracking URL that customers can use to monitor the status of their ticket โ€” no login required.

1
Customer receives tracking link
When a ticket is created, the customer gets a unique URL via SMS or email (e.g., app.servicing24.com/tracking/TK-00123).
2
Customer opens the link
The tracking page shows real-time status, agent notes marked as 'customer-visible', and the timeline of activity.
3
Status updates appear automatically
Every time an agent updates the ticket status or adds a customer reply, the tracking page reflects it immediately.
๐Ÿ’ก
TipShare the tracking link with customers via WhatsApp for instant support status updates.