Servicing24/Docs/Inventory

Stock Summary

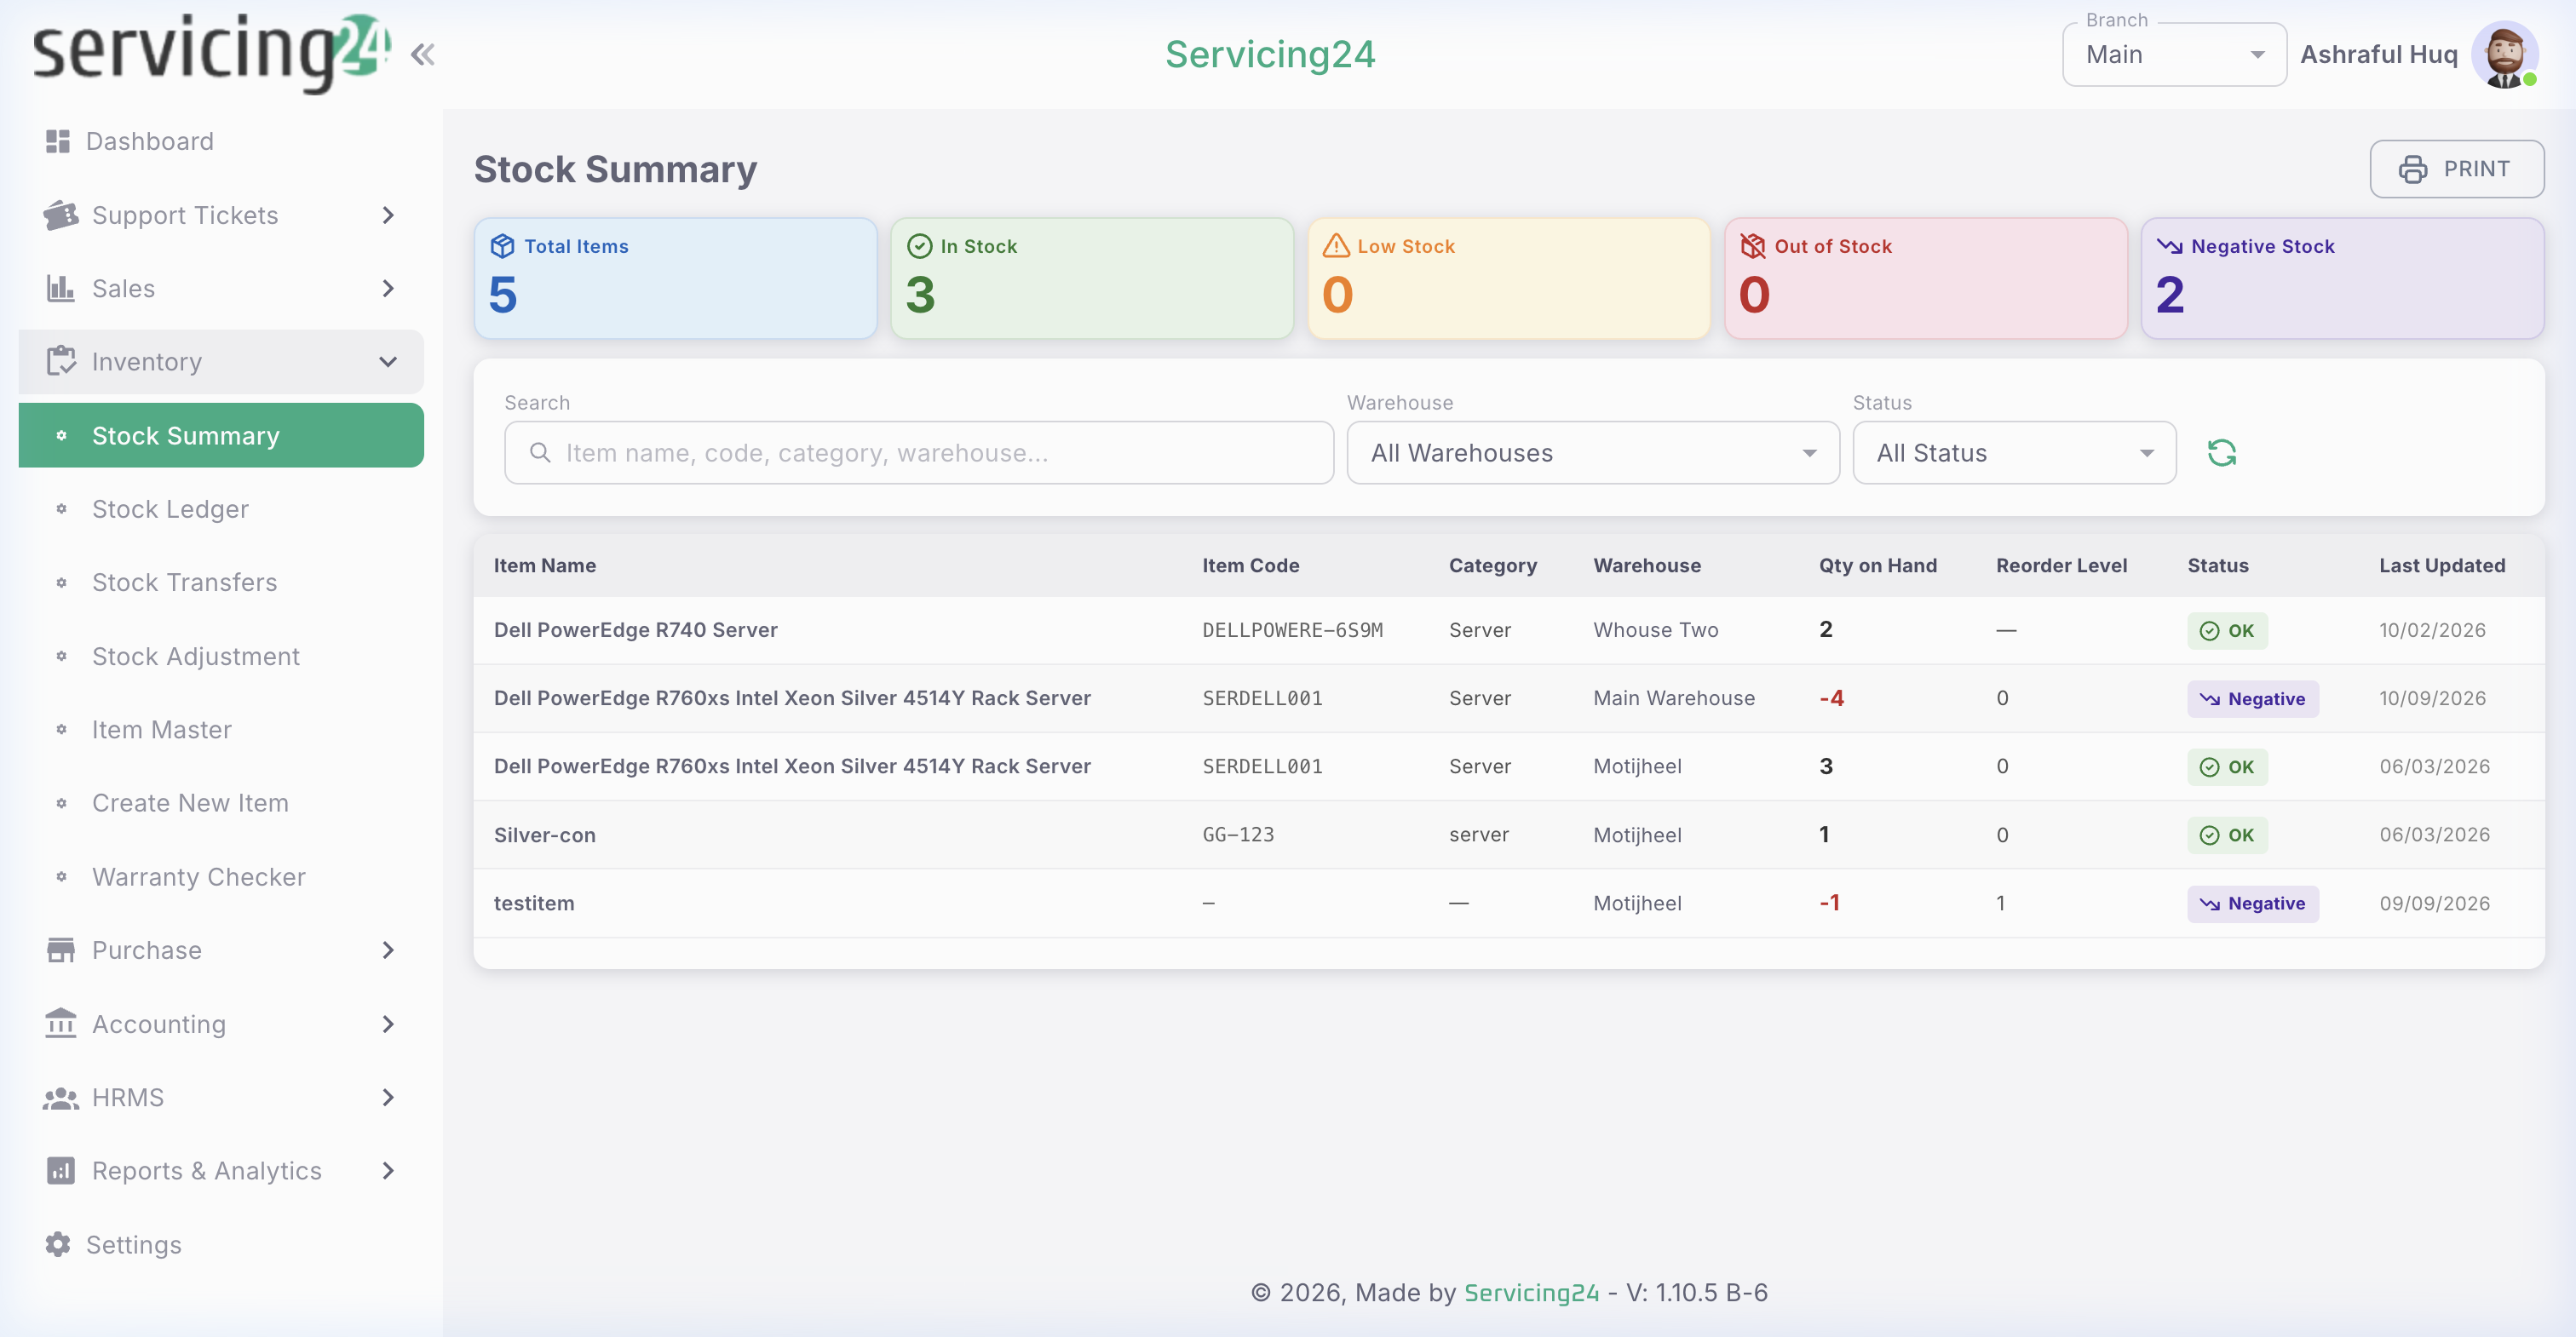
The Stock Summary gives you a bird's-eye view of all your inventory items, their current quantities, and value across all branches.
app.servicing24.com/inventory/stock-summary
Stock Summary โ€” current stock levels for all items across branches
๐Ÿ“ธ Stock Summary โ€” current stock levels for all items across branches
1
Go to Inventory โ†’ Stock Summary
The summary table shows each item, its category, branch, current quantity, and unit value.
2
Filter by branch
Use the Branch filter dropdown to see stock for a specific location.
3
Identify low-stock items
Items below their minimum stock threshold are highlighted in red. These need to be reordered.
4
Export the report
Click Export to download the stock summary as an Excel file for external use.
โš ๏ธ
WarningLow stock alerts are also shown on the Dashboard. Set minimum stock levels in the Item Master to activate alerts.

Stock Ledger

The Stock Ledger shows a full transaction history for each item โ€” every purchase, sale, transfer, and adjustment that affected stock levels.

1
Go to Inventory โ†’ Stock Ledger
Select an item and date range to view its complete movement history.
2
Choose an item
Search for the item by name or code. The ledger shows all transactions in chronological order.
3
Review IN and OUT movements
Each row shows: Date, Transaction Type, Reference (PO/Invoice/Transfer), Quantity In, Quantity Out, and Running Balance.
4
Export to Excel
Download the ledger for audit or reconciliation purposes.

Stock Transfers

Transfer stock between your branches to rebalance inventory levels without creating a purchase or sale transaction.

1
Go to Inventory โ†’ Stock Transfers
See all past transfers. Click 'New Transfer' to create one.
2
Select source and destination branch
Choose which branch is sending stock and which is receiving it.
3
Add items to transfer
Select items and enter the quantities to transfer. The system validates that you have sufficient stock.
4
Submit the transfer
Click Submit. Stock is immediately deducted from the source branch and added to the destination branch.
5
Print the transfer slip
Print a transfer slip for physical records during transit.
โ„น๏ธ
NoteTransfers require permission on both branches. Contact your administrator if you cannot transfer to a particular branch.

Stock Adjustment

Use stock adjustments to correct inventory discrepancies found during physical stock counts, damages, or write-offs.

1
Go to Inventory โ†’ Stock Adjustment
This creates a manual correction entry for any item.
2
Select the item and branch
Choose the item and the branch where the discrepancy was found.
3
Enter adjustment type
Choose Increase (adding stock) or Decrease (removing stock). Enter the quantity and reason.
4
Add a reason note
Always document why the adjustment is being made (e.g., 'Physical count variance', 'Damaged goods write-off').
5
Submit
The adjustment is recorded with a timestamp and the name of the user who made it for full auditability.
๐Ÿšจ
CautionStock adjustments affect your financial records. All adjustments are logged in the Audit Trail.

Item Master

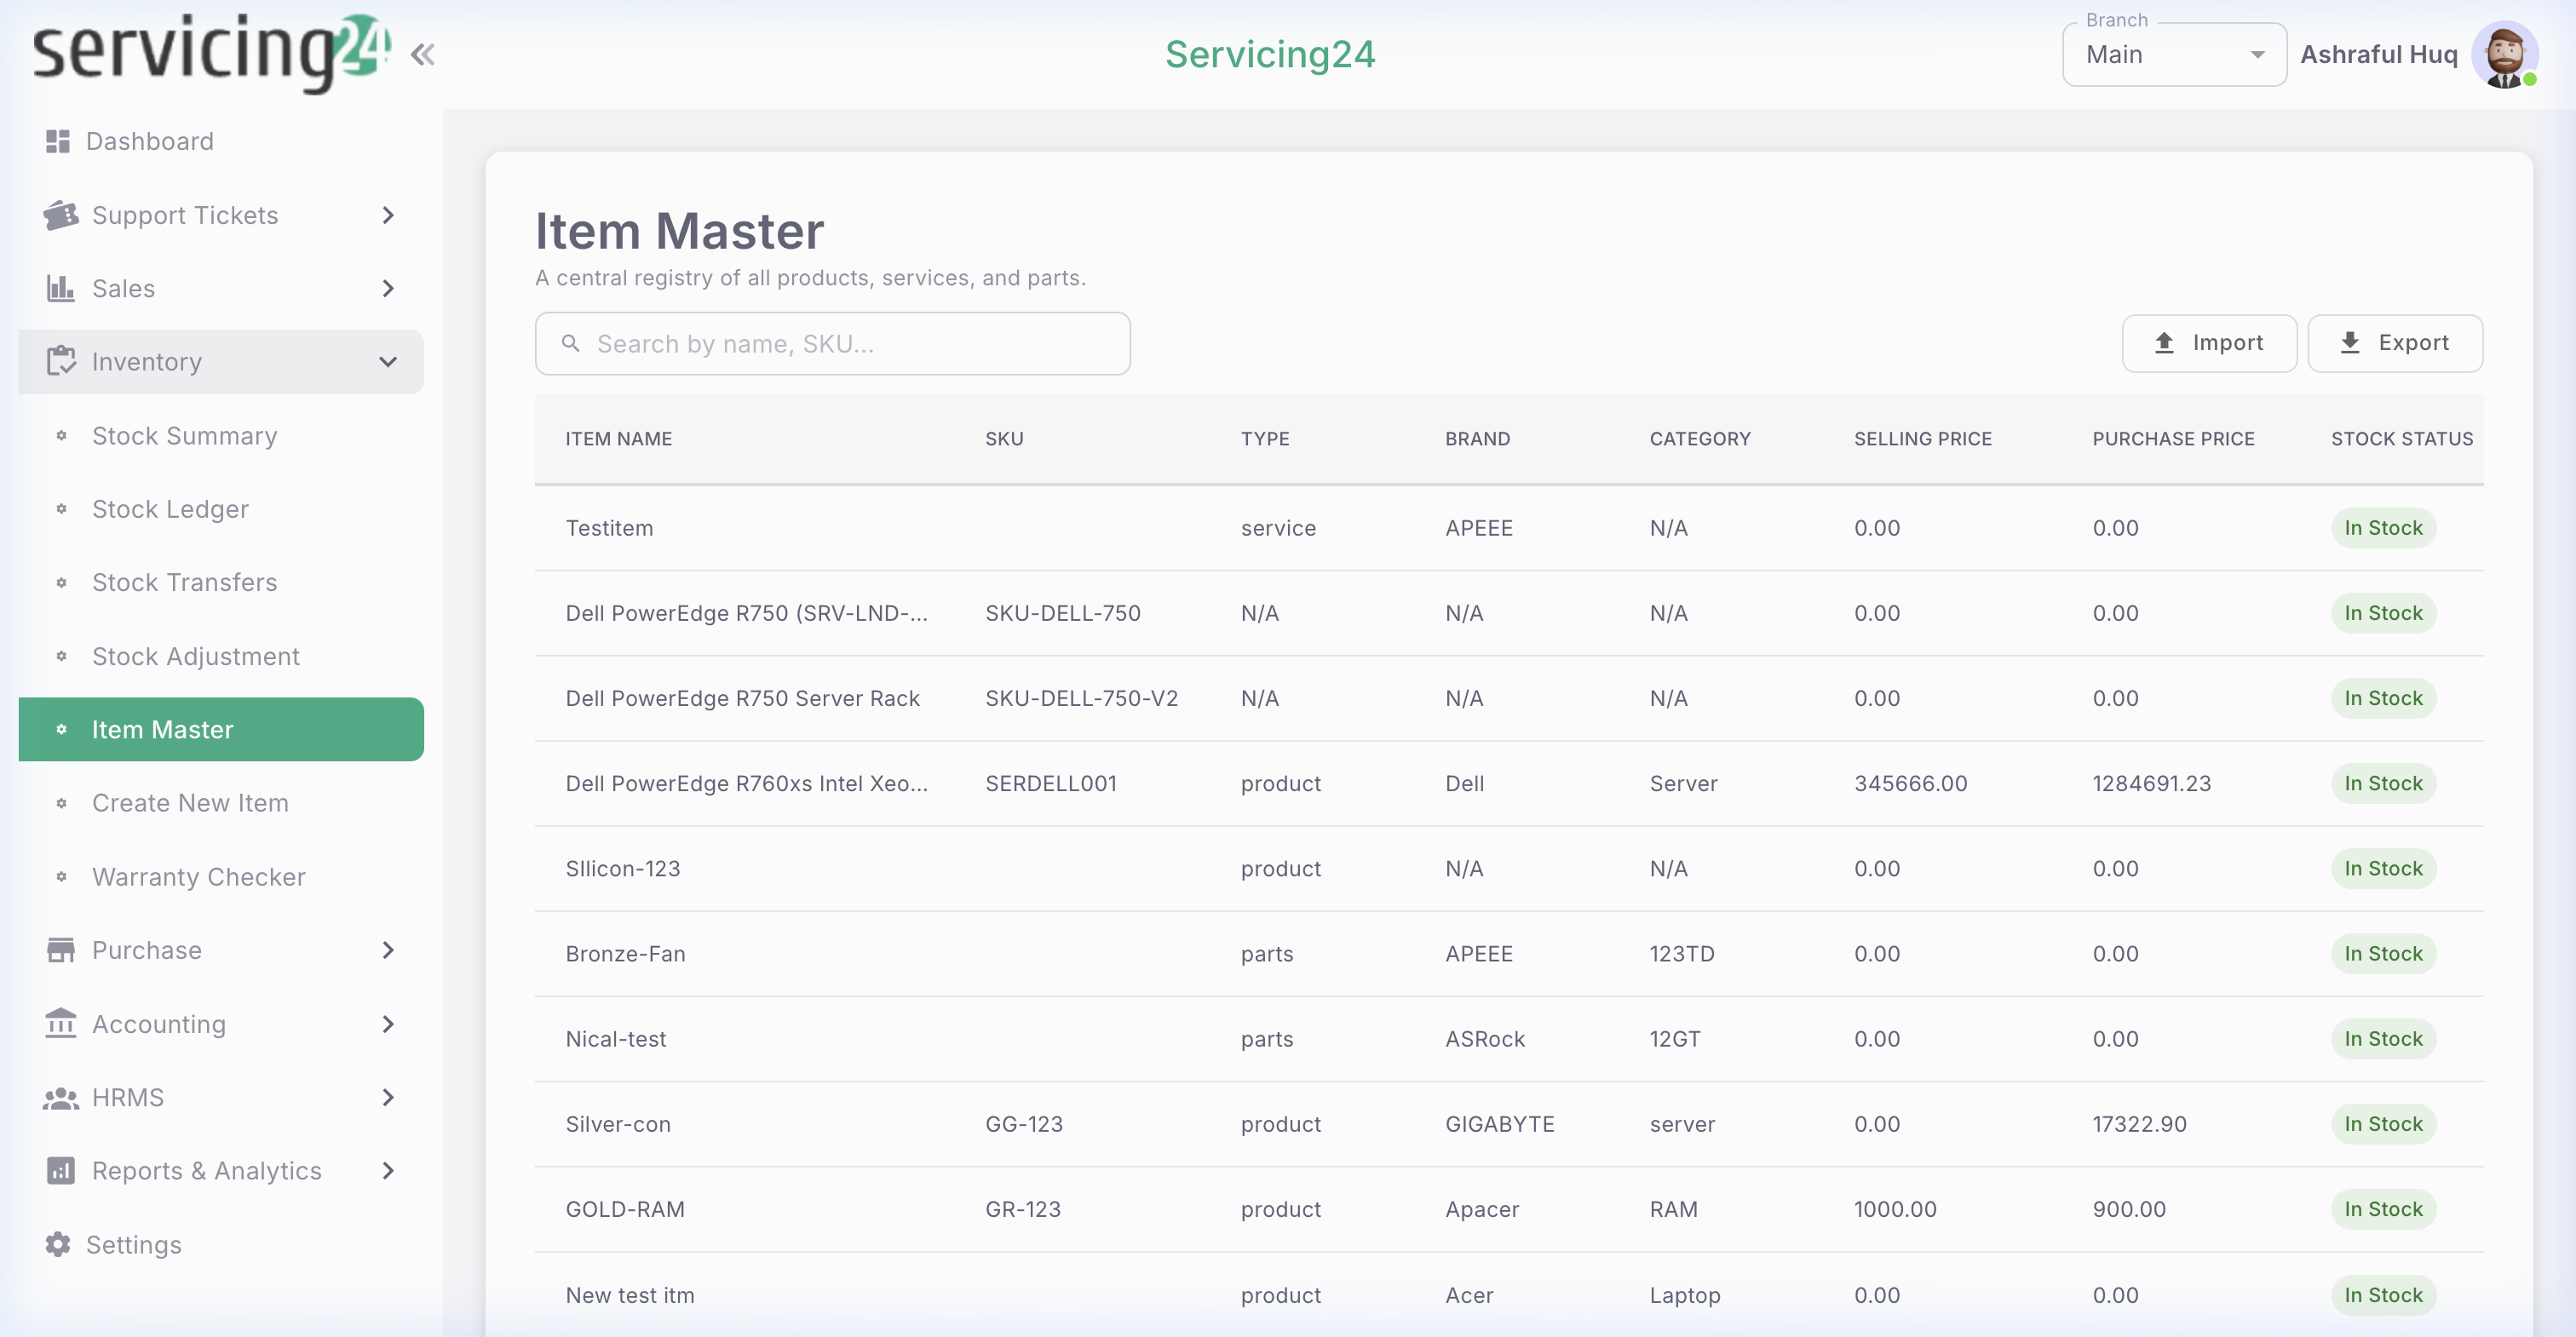
The Item Master is the central catalog of all products and parts in your inventory. Every item in the system is defined here.
app.servicing24.com/inventory/item-master
Item Master โ€” complete product and parts catalog
๐Ÿ“ธ Item Master โ€” complete product and parts catalog
1
Go to Inventory โ†’ Item Master
View all items in your catalog with their code, name, category, unit, and current stock.
2
Create a new item
Click 'Create New Item'. Fill in: Item Name, SKU/Code, Category, Unit (pcs, kg, etc.), and Selling/Purchase Price.
3
Set stock thresholds
Enter the Minimum Stock Level โ€” the system will alert you when stock falls below this number.
4
Add item description and image
Add a description and optionally upload a product image for easy identification.
5
Configure opening stock
If this is a new item with existing stock, enter the opening quantity and value.
6
Save the item
Click Save. The item is now available for use in purchases, sales, and inventory transfers.

Warranty Checker

Quickly verify whether a product or device is still under warranty using the serial number or purchase date.

1
Go to Inventory โ†’ Warranty Checker
Open the warranty check tool.
2
Enter serial number or IME
Type the device serial number or IMEI. The system searches your records.
3
View warranty status
The result shows: Purchase Date, Warranty Period, Expiry Date, and current status (Valid / Expired / Not Found).
4
Link to ticket (optional)
From the warranty result, you can immediately create a support ticket linked to this device.